

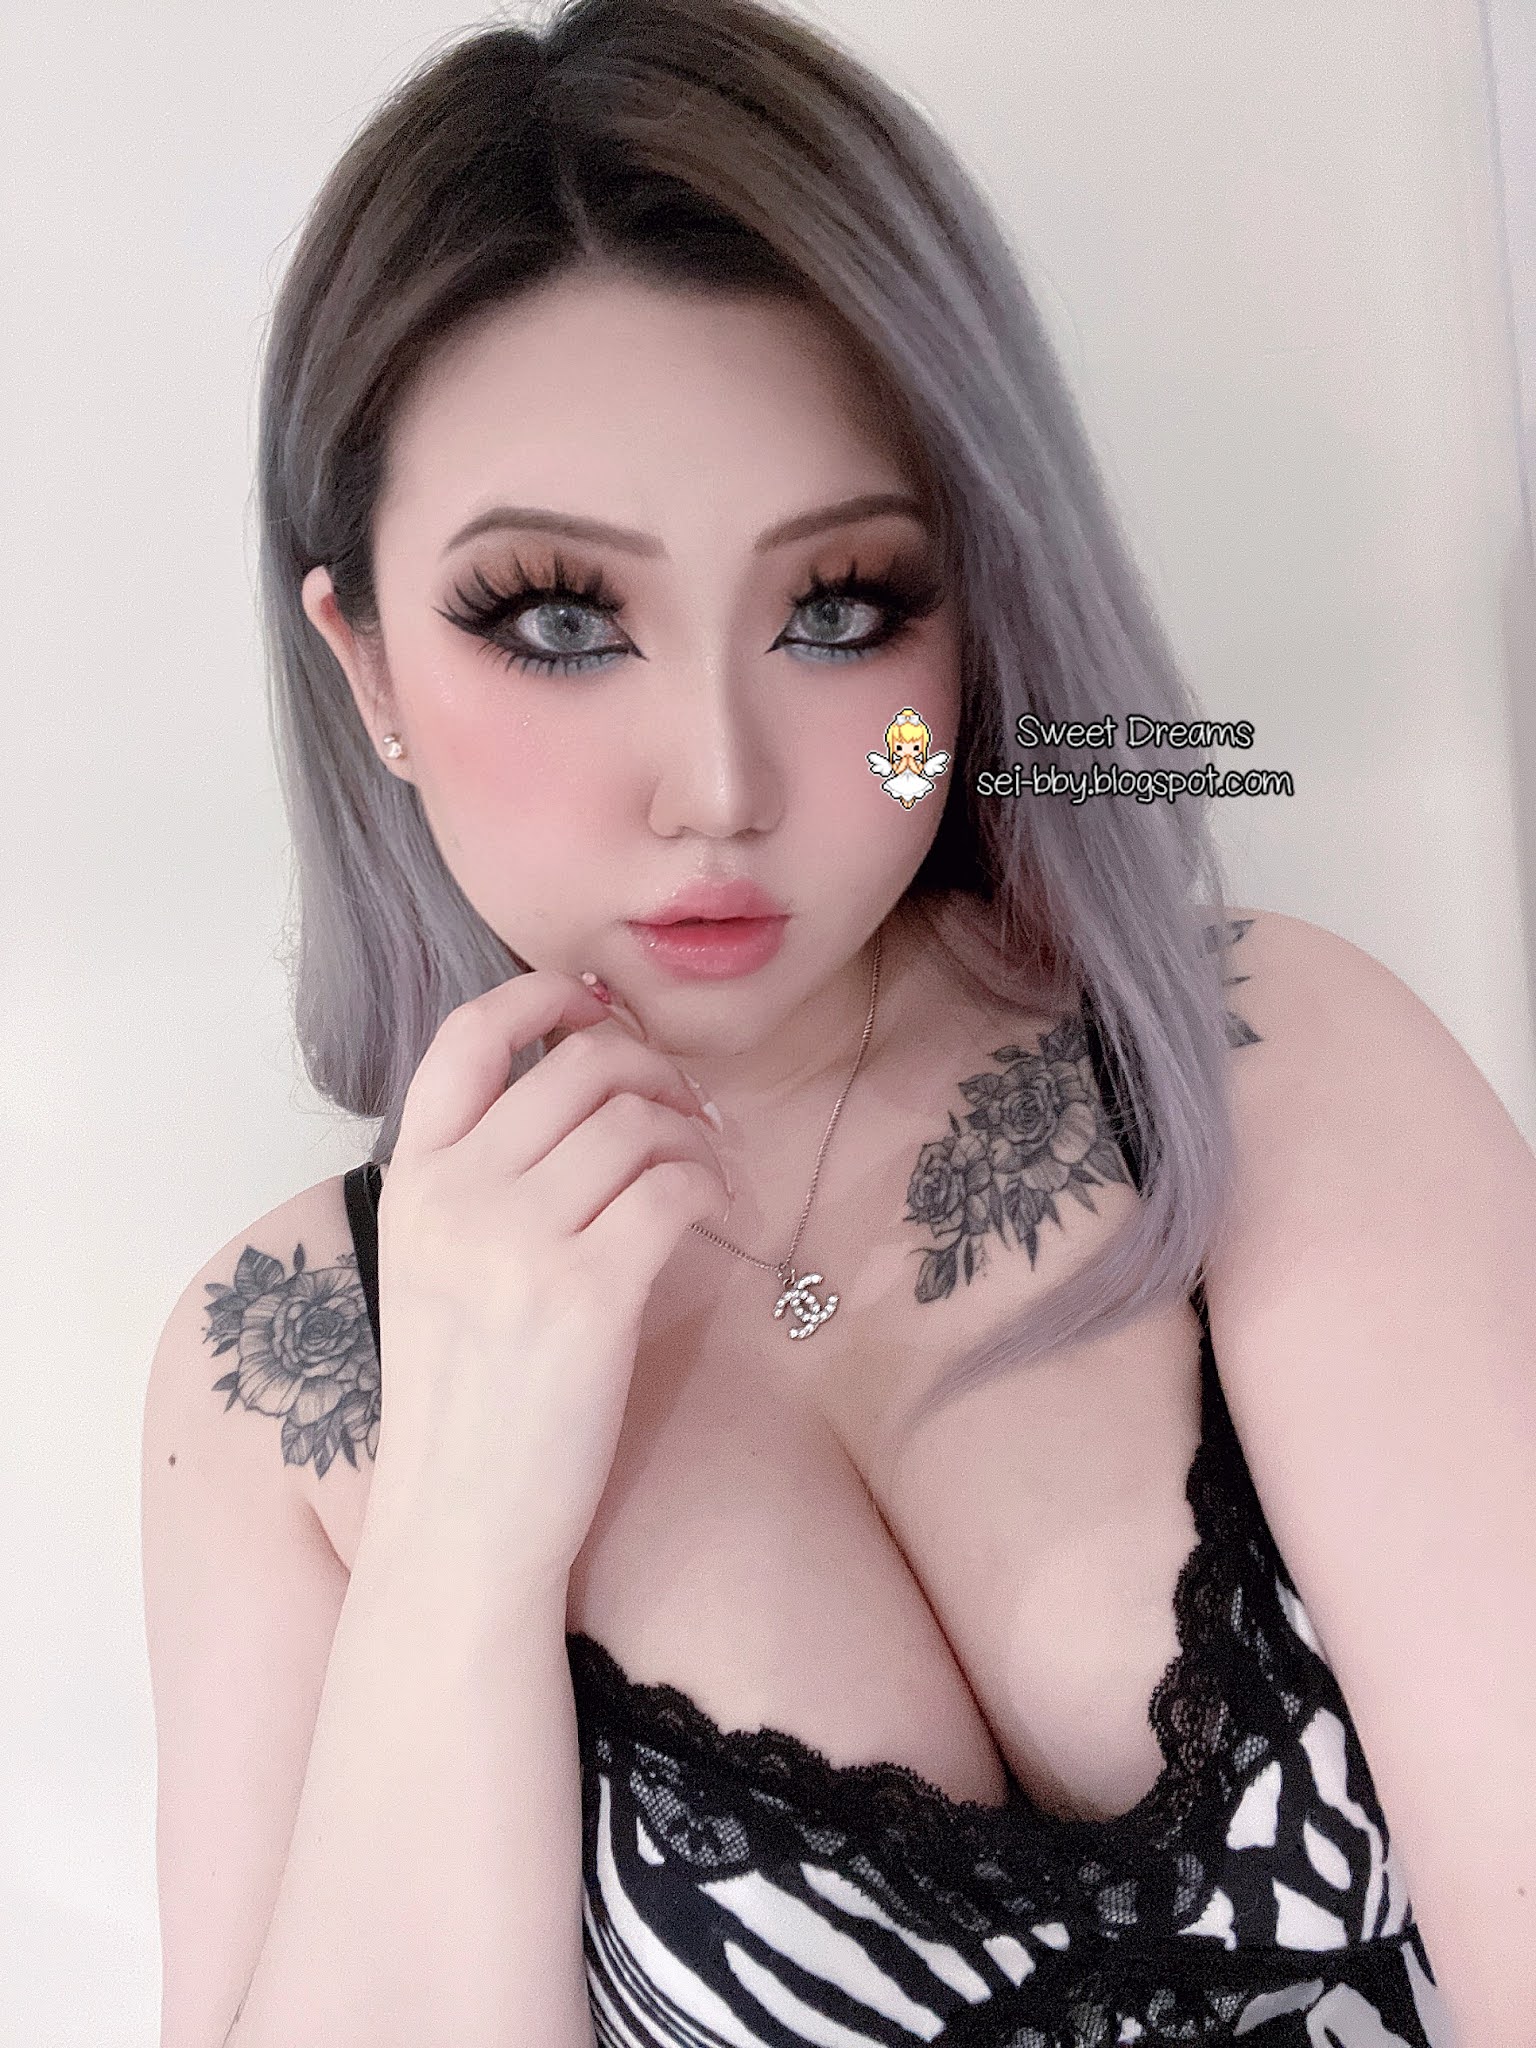
Hi angels! I did another video call with Lyon and decided to try out Cocona/Serina's makeup. I thought I would document the process and make another tutorial post so today I'll show you how I recreated her look 🥰


Here are the products that I used to recreate this look. I highlighted the shades I used from each palette as I will be naming them in the steps so I hope this makes it easier to follow!


✨abh norvina & amrezy palettes
✨morphe 351 icy fantasy palette - shade is called cold snap
✨peripera ink black cara in #02 volume curling
✨clio kill lash superproof mascara volume curling
✨nars smudge proof eyeshadow base
✨dollywink liquid eyeliner
✨macqueen waterproof gel liner in espresso latte (for tightlining)
not pictured:
✨duo brush on lash glue
✨eyelashes & lash curler
If you don't have these exact products, you can try this with similar shades! Now that we've got everything we need we can move on to the tutorial~
Step 1
Prime your lids then use "incense" from norvina for an all-over wash of color.

Step 2
Using the shade "volatile" from norvina, create definition by applying this in the inner third and outer corner of your eye, creating a ">" shape on the outside.

Step 3
Mixing "bk" and "yugo" from amrezy, deepen the shading you did in step 2, leaving the center of your lid blank.

Step 4
Using "eccentric" from norvina, create a transition from the shade work in the step above and the blank center of your lid. Try not to over blend. (Apologies that this step might be hard to see in the pic bc I don't have a lot of lid space 😅)

Step 5
Take the shade "dragon" from amrezy and apply it to the center of your lid, blending out into the shade you applied in step 4 slightly. I also put "gemini" from amrezy in the very center of my lid on top of the "dragon" shade because I thought it made the gold a little more interesting but I honestly don't think it made much of a difference so feel free to skip that 😂 (that's what the darker flecks are)

Step 6
Taking "volatile" from norvina, define your tear bag area.

Step 7
Highlight your tear bag with "leo" from amrezy. I brought the color all the way past the middle of my eye but left the outer corner blank because I will be filling this with eyeliner later.

Step 8
Apply "cold snap" from morphe's icy fantasy palette on the inner corner to create some dimension.

Step 9
Tightline and apply mascara.

Step 10
Apply your liquid liner. I did an elongated wing that connects to the droop in my lower lash line so it sits a bit lower than a typical wing and is also a bit thicker.

Step 11
Apply lashes and finish off your look by drawing a point in your inner corner and connecting it to the waterline.


No comments:
Post a Comment
Let me know what you thought of this post! ♡