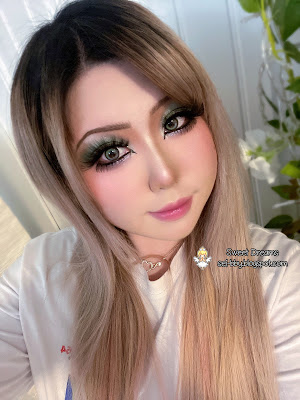
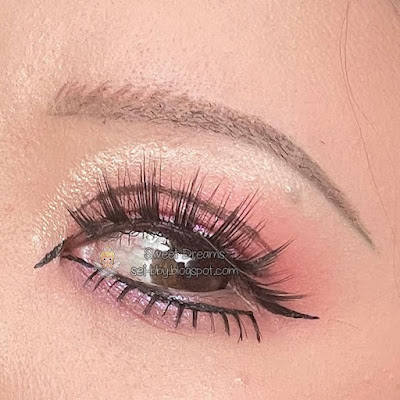
Hello angels! I hope you're having a lovely day. I often get a lot of comments and questions about how I take my makeup closeups so I thought it would be helpful for me to show you how I prep for makeup and how I take those photos 🥰
I'll be sharing some tips and tricks to help you get some good, high quality photos of your makeup so that you can have a nice archive of looks to review and learn from. Let's begin!
In my opinion, good skincare is the most important part to a flawless makeup application. Without proper skincare prep your makeup will wear and fade poorly throughout the day. Think of your face as the canvas for your art and as such you want to prep and prime it well.
 |
These are some of my favorite products to use for prep!
You can shop all these here |
I've included a lot of different products in the photo above but I don't use every single one every time I do my makeup, this is just a range of products I like to reach for that work well together without over-prepping my skin.
On that note it is possible to over-prep your skin so keep that in mind when choosing your skincare products. Over-prepping means putting on too much skincare or layering in too many products that take a long time to sink into the skin. This essentially leaves a barrier on your face that makes it difficult for the makeup to sit and settle while also breaking it down. This is usually the primary cause for your makeup products pilling, pooling, and fading, especially around the nose, mouth and undereye areas.
For this reason I like to stick to lightweight products and only use about 2-3 products and a sunscreen then primer. Depending on your skin needs you might be able to get away with just 1 product and some sunscreen/primer.
I'm going to take the above photo and split it into 2 categories, staples and variable products. You don't have to use these exact products btw but you probably want to use a similar combo of these product types to build a routine that works for you and the season.
For reference I am combo/oily skin with a little bit of rosacea in my cheeks but otherwise no other real concerns.
These are my staple products or the bare minimum products in my routine. If I don't have time to add more products these (with a sunscreen) will usually suffice!
 |
these are basically a toner, eye cream, essence, lip balm
and a vitamin c serum*
*if you use a vitamin c serum be sure to use spf as vitamin c
makes you more sensitive to sun damage |
These are my variable products, which are options that I can pick from if I have specific skin needs.
 |
| these are moisturizers, toners, and sunscreen options~ |
The key difference between the products here is just the consistency; some items are thicker/more rich for colder weather while others are more watery for hot days.
A typical routine for me would be:
- Toner
- Eye cream
- Essence/serum
- Sunscreen
- Primer (not pictured)
(I'll also use a lot of setting spray in between makeup steps but that's up to you. I prefer a more radiant/dewy finish so I typically use the setting spray after my base, blush/contour, and at the end to set the full face)
I typically skip the moisturizer step as most of my sunscreen products are really hydrating, especially when layered on top of the rest of the products and a primer. I found that with a moisturizer added into this routine takes too long to sink in and that will cause my foundation to separate on my nose and around my nostrils.
Here's a little close-up to show what I mean:
 |
all these photos were taken after a full day of wear with the same makeup products
left: proper prep & priming; my foundation is intact
middle: prop prep & priming but I didn't wait long enough after
so some of my foundation is coming off
right: too much prep; the foundation is really coming off because I have too much skincare pooled in these areas which broke down the makeup on top |
Now that we have that down I'm going to show you some tips on how I take the close up eye pics like the one below!
1. Use the back facing camera on your phone, not the front
The front camera is great for selfies but not so great for picking up any makeup details. It's a bit more difficult to make sure you're getting what you need in the pic but a lil trial and error will go a long way.
2. Stand in front of a bright cool/white light source
You're going to want to eliminate as many shadows as possible. This will help your phone pick up the makeup details. You want a cool or white tone light so it doesn't alter the colors too much. Standing in front of a window with bright indirect sunlight also works if you don't have a nice light source to stand by.
Don't worry too much about the color grading if all you have is a warm light source, you can always edit the photo after to adjust the tones but having a cool/white light source helps reduce editing so try your best!
3. Look up into the light source and hold your phone down towards your face
This is going to help you reduce shadows and get the most clear photo of your eye. You're not going to get the most flattering photo of your face but the key here is trying to get a clear and detailed photo of your eye. Try to hold your phone as close to your light source as possible to minimize creating a shadow on your face.
I typically hold my phone like a ruler's length away from my face for my closeup eye photos. You don't want to hold the phone really close to your eye (even though that's what your taking a pic of) because it won't focus well that close!
 |
image from google; this shows you the positioning I'm
describing above |
4. Edit and crop your photo
Once you get your photo, edit and crop it to show off your makeup! No one will know how silly the rest of your face might look at this angle so it doesn't matter if you made a face or if it's a bad "selfie". Focus on getting a clear and steady photo of your eye because that's what you'll get to post in the end. Play around with the angles by moving your head or rotating the photo to get more interesting looking pictures and to show off any detail/glitter/duo chrome eyeshadow work!
Here are some examples where I just look around and get different angles of my eye:
That about wraps this post up. I hope this was informative and that you learned some new tips and tricks to take better photos of your makeup 💖
Thank you for reading, I'll see you in the next post 🥰


