Welcome Message

*** Feb 4, 2024: New post is up~! ***

Monday, November 29, 2021

ABH Subculture Cut Crease Gyaru Makeup

Hello angels! I hope you've been well. It's gotten quite cold lately and my skin is being absolutely destroyed by the winter air. Literally I'll sit down to do my skincare religiously and my skin just... doesn't care lol I hate it here.

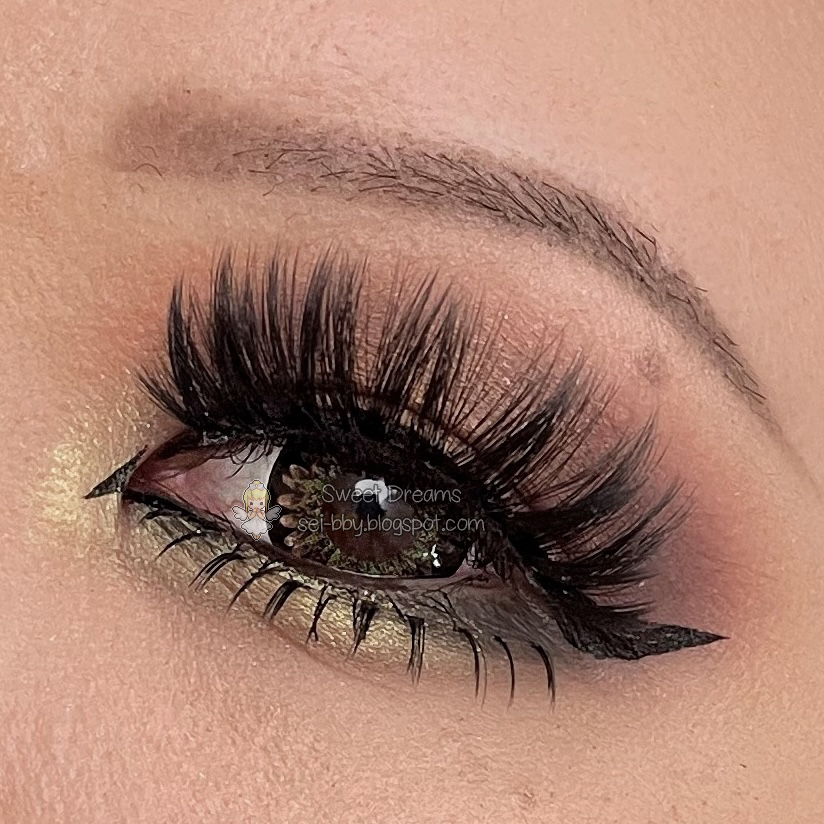
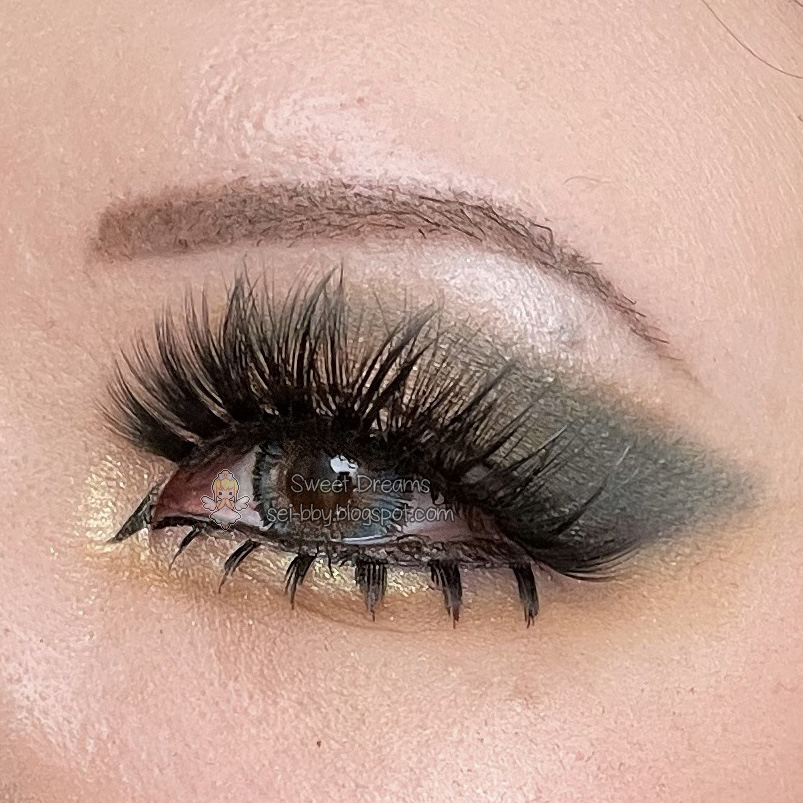
The other day I was itching to do my makeup so I could use more of the abh subculture palette I bought. I was looking at tutorials online for inspo since I wasn't really sure what I wanted to do. After watching a few I decided to try out this cut crease type look. I only used the abh palette for this look and it was really fun to work with the yellow and peachy orange shadows!
I thought about doing a tutorial for this but honestly my brain has been feeling kind of deep fried so I did this look just for fun but let me know if you're interested in a tutorial!
Products used:
✨nars smudge proof eyeshadow base
✨abh subculture palette - using the shades "cube", "dawn", "roxy", "electric", "destiny",
"adorn", "new wave", "axis", "rowdy", and "edge"
✨unny club full cover tip concealer
✨lashes from aliexpress
✨ofra highlighter - rodeo drive
misaki 4 tone aqua lenses (affiliate link)
✨peripera ink black cara in #02 volume curling
✨clio kill lash superproof mascara volume curling
✨dollywink liquid eyeliner
✨macqueen waterproof gel liner in espresso latte (for tightlining)
✨duo brush on lash glue
I had an idea to twist my hair into little pony tails and pin them up behind my head. I think it looks cute as it is but pairing this with a beanie/toque  will definitely elevate it so I'll have to try that when my buyee order comes in 🙈
I found this cute filter on ig that looks like puri hehe
kinda wish you could turn down the face tuning though,
it makes me look too crazy so I made a face 😅 
I was really happy with how this look turned out. I never used to be into fall but for some reason I'm really vibing with it this year. I'm going to try out some more looks for the season and also do a holiday look series based on the results from an ig story prompt I put out a few days ago, so stay tuned for that!

Thanks for reading and I'll see you next time~ 💖

Friday, November 26, 2021

✨ Fall Halo Eye Make Tutorial 🍂

Hi angels! I hope you're all staying safe and warm. It has been storming for us here and a bunch of our roads got closed due to flooding and landslides. Thankfully I'm at a safe elevation and not near any of the impacted areas, but it's still awfully cold and the wind taking out my power has been a real concern 😭

Anyways, today I have a one palette fall halo eye tutorial for you. I'll be using the abh subculture palette I got last week to create this look. If you don't have this palette please use anything of similar color/value!

Here are the products that I used for this look. I highlighted all of the shades I used and listed their names as I will only be using their names in the respective steps.
✨abh subculture palette - using the shades "dawn", "roxy", "all star", "rowdy", "adorn", "untamed", 'mercury", "electric", "cube"
✨peripera ink black cara in #02 volume curling
✨clio kill lash superproof mascara volume curling
✨dollywink liquid eyeliner
✨macqueen waterproof gel liner in espresso latte (for tightlining)
✨duo brush on lash glue

not pictured:

✨urban decay priming potion
✨unny club full cover tip concealer - shade 1.5

Step 1

Prime your lids and use the shade "dawn" all over your eyelid

Step 2

Taking "roxy" sweep it all over your eyelid focusing in the socket area

Step 3

Using "all star" create some dimension by adding it in the inner and outer thirds of your eyelid. With a sweeping motion on a fluffy brush, blend this into the previous color.

Step 4

Pick up the shade "rowdy" and deepen the area you just applied "all star" to. Again, use a fluffy brush to blend.

Step 5

Apply a dot of concealer in the center of your lid and pat in with a flat brush. Set the concealer with "dawn" and put "adorn" on top of that, blending the sides into the colors you put down in the last 2 steps.

Step 6

Apply "untamed" to the inner and outer third of your lower lashline, leaving the center blank.

Step 7

Using "mercury" define the aegyo sal area and apply the shade "electric" into the defined area.

Step 8

Use "cube" to highlight your brow bone.

Step 9

Apply mascara and tightline. On the lower lashline only tightline the area that you left blank in the center.

Step 10

Apply liquid eyeliner. For this look I did a downturned wing (draw the liner downwards following your eyeshape then winging it).

Step 11

Apply eyelashes

Step 12

Finish up the look by defining the inner corner with liquid eyeliner.
And you're done! Here's the finished look:
Here's the full face:
I hope you liked this tutorial! I had a lot of fun playing with this palette and I hope to create more looks for you with it again soon.

See you next time~ 🥰💕

Wednesday, November 24, 2021

✨ Iro Iro Hair Dye Review & New Hair Reveal 🙈

[Disclaimer]: This review is not sponsored and will be my 100% honest opinion based on my personal experience with the product. I have an education in cosmetology but I am currently not a licensed professional. If you choose to copy my methods or techniques you are doing so at your own risk. I recommend that you see or consult a professional before coloring or bleaching your hair yourself at home.

Hello angels! Today I'm going to be reviewing the hair dye I got in my mini haul from the other day. I bought a few different colors but I will mostly be reviewing the Iro Iro Silver and Neon Pink dye. I'll walk you through my whole process and give you my final thoughts on it as an alternative to Overtone and Arctic Fox.
So I was using the Schwarzkopf BlondMe Blush Wash in silver and strawberry for upkeep recently. I didn't like the strawberry color much but I wanted to use up the product. This is what it looks like kinda faded out:
I thought it would be a good idea to strip out all that first before using this new color so I sat myself for a stripping mask (baking soda, developer, purple shampoo, and dish soap). I let that sit in my hair for maybe 30-45 minutes and then rinsed it out and dried my hair.

This is what it looked like after stripping the color out:
Ideally I would've liked to do another round but I ran out of baking soda so I left it like this.
Now that my hair is prepped, I went ahead and mixed up the color. You don't have to mix it with anything you can use it straight out of the package but I was afraid the pink would be too neon and the silver would be too dark, so I diluted it with some conditioner.
I added a tiny bit of Iro Iro's Purple to the pink because it was feeling a bit warm but otherwise these are just mixed with some conditioner.

I applied it to my hair and let it sit for about 30 minutes as per the instructions.
Pro tip: if you don't have a coloring cape (mine was in the wash from the stripping mask) just cut some holes in a garbage bag and you've got yourself some home salon couture 😂
Once the time was up I rinsed and dried. This was the result:
Here's a before and after comparison that I posted on IG. As you can see the pink part didn't really show up the same way as it did in the pot but the silver was spot on.
I wasn't satisfied with this so I actually did another round of color on the pink to try and make it more vibrant. This time I didn't mix any of the purple in, I mixed in the pink and some conditioner into whatever I had left over in that pot of color and this was the result after letting it sit for another 30-40 minutes:
It's super bright and obnoxious but that's what I wanted! Since I still had a little purple in the mix it didn't turn out too warm for my liking so I'm pretty happy with how it turned out.
Pigmentation: ♥♥♥♥ 
The coverage on this was fantastic. Once I hopped in the shower the water basically ran clear after a minute or two and the color was pretty true to what was in the bowl for the most part. I think if you start mixing or diluting it your results will vary but if you stick to just what's in the package & add some conditioner you'll get what you see.

Packaging: ♥♥♥♥♡
I adore that these come in a squeeze package instead of a traditional tube, bottle or tub. This lets you get every last bit of product out without wasting any. My only complaint is that I wish it came in a bigger size because it took 1 package for each color on my head and that was barely enough.

Price: ♥♥♥♥♥
I got these at Sally's for $15.99 CAD each (+tax on top). Compared to Arctic Fox ($26.99 CAD on Amazon) and Overtone ($25 USD + tax and shipping) for the same amount of product, this is a steal and more accessible for me with no shipping times.

Overall Rating: ♥♥♥♥♥ 
Compared to AF and OT, this made my hair feel the best. OT leaves my hair feeling kind of slimy and AF didn't do anything for my hair in that department. My hair is super soft and silky without needing to condition on top and the color is more vibrant than the other two competing products. I am very happy to have discovered this brand and I'm thankful to all my friends who recommended this to me!
I hope this was a helpful read! Let me know if you've tried any of the other colors from this brand or if you have any hair color brands you'd recommend me trying.

Thanks for reading and I'll catch you around later~

Strawberry On Top Of Cupcake