Hi angels! Today I have a very special post for you. I recently had a video call with Lyon and Mando. We did our makeup together and I decided to make a tutorial out of the look I did. I've been thinking about making more gyaru make tutorials but I'm not sure what format would be best.
I was thinking a quick video (like an instagram reel) paired with a text and picture post like this but I'm not sure if there's any interest in that? It's a lot easier to just do text and picture but I feel like some things might get lost in translation 🤔 I also toyed with the idea of making youtube videos but I don't currently have a good setup for it so I'd need to buy some things to make this happen, which makes me hesitant lol.... Please let me know what you think would be best of these options!
For today's look I was inspired by this image from makeviviju on instagram. I actually didn't realize her post was a tutorial lol I just copied this picture as best I could with the products I had and made it gyaru. Here are the products that I used to recreate this look. I highlighted the shades I used from each palette as I will be naming them in the steps so I hope this makes it easier to follow!
✨abh norvina & amrezy palettes ✨etude house mirror holic liquid eyes in WH903 pure water
✨daisque palette in #07 milk latte
✨dollywink liquid eyeliner
✨peripera ink black cara in #02 volume curling
✨clio kill lash superproof mascara volume curling
✨nars smudge proof eyeshadow base
not pictured:
✨macqueen waterproof gel liner in espresso latte (for tightlining)
✨duo brush on lash glue
✨eyelashes & lash curler
If you don't have these exact products, you can try this with similar shades! Now that we've got everything we need we can move on to the tutorial~
Step 1
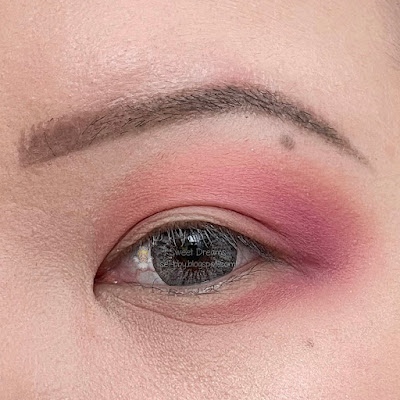
Prime your lids then use "love" from norvina all over your lid and under the outer third of your under eye, creating a C shape around your eye.
Step 2
Using "semsa" from amrezy mixed with a little of "passion" from norvina, create definition by applying this in a v shape on the outer edge of the C shape you created in step 1
Step 3
Apply "soul" from norvina on the inner and middle part of your lid, stopping just when you meet the V you created in step 2. Try not to overlap the colors too much here and don't over blend your work.
Step 4
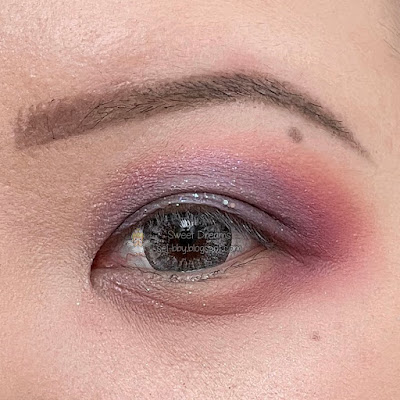
Apply a mix of "cupcake" and "leo" from amrezy over the same area you applied "soul" in the previous step.
Step 5 (optional)
I'm putting this as an optional step because I'm not sure that I liked this in the end. Using the etude house mirror holic liquid eyes, apply glitter to the center of your lid.
Step 6
Use "passion" from norvina to outline your under eye tear bag (aegyo sal/namida bukuro). If you have trouble finding this area, squint slightly and notice the protruding bump under your eye when you do this. You want to shade just under this bump.
Step 7
Highlight your tear bag with a glitter shadow. I'm using the one highlighted in the daisique palette.
Step 8
Apply mascara and tightline. I use the peripera mascara for my top lashes and the clio one for my bottom lashes. No reason for this other than the clio mascara brush is smaller and easier to get into my lower lashes. For tightlining the bottom lash line, only line the first third of your waterline then create a small droop starting from the middle of your eye going out to the corner.
Step 9
Apply your liquid liner, I did a wing for this look but you can do whatever eye shape matches you best. Apply the bottom lash under the liner that you drew on in the previous step. I used my liquid liner to outline the bottom of the droop first before sticking my lashes on for a cleaner look.
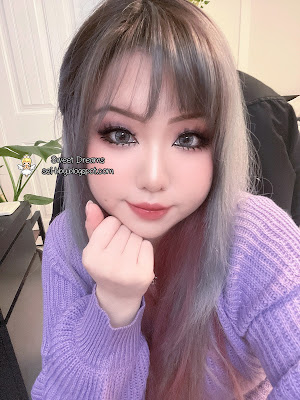
That's it you're done! Here's what the full face looks like: I really hope you enjoyed this tutorial. It was super fun for me to do and I would love to do more posts like this 🥰 Please let me know if there's anything that could be improved on to make the tutorial easier to follow or give me suggestions on looks you'd like to see in the future!
Thank you so much for reading, I hope you have a lovely day 💖


No comments:
Post a Comment
Let me know what you thought of this post! ♡